C.4. Zend Studio Client: Overview
The Zend Studio is designed for the professional PHP developer. It is the only Integrated Development Environment (IDE) that encompasses all the development components necessary for the full PHP application life cycle. Zend Studio will help speed up your PHP development process and yield robust, bug-free code.
Zend Studio simplifies the development tasks involved in creating PHP applications. These tasks include developing, debugging, managing, and deploying:
Development-related tasks are simplified via advanced code completion, project-wide and file-localized code inspectors, project management, cross-file searches, and code highlighting. Debugging tasks are simplified via a remote debugger that allows you to debug files directly from your server. An internal debugger allows you to also debug files from your local computer. Management tasks are simplified via project management capabilities and advanced diagnostic tools such as the Profiler and Code Analyzer. Deployingpublishing your PHP/HTML application to a hosting server for web accessis simplified by defining an FTP/SFTP site, or by using the powerful CVS integration.
C.4.1. Studio Components
The Zend Studio consists of two main components that interact with each other to run and debug PHP applications:
Zend Studio Client.
Zend Studio Client includes the bulk of the user interface, and is installed on your local drive. It is a powerful, integrated platform for writing and maintaining PHP applications. It includes the Zend Browser Toolbar, the PHP manual, and all the components required for the internal debugger for PHP 4 and 5.
Zend Studio Server.
The Zend Studio Server adds remote debugging and profiling capabilities to existing PHP servers. Additionally, the Zend Studio Server allows you to set up a PHP-enabled web server, even if you don't already have one. The Zend Studio Server package includes the following components: Zend Debugger, Zend Server Center, WinEnabler Technology, Apache Web Server, and PHP 4 and 5.
C.4.2. Client Server Configuration
Zend Studio can install the Studio Client package in conjunction with the Studio Server package. This establishes a full client-server development environment, complete with an HTTP/PHP server that has development support.
By connecting to an existing externally installed server or directly to the internal server component, Zend Studio enables code to be debugged in the environment of choice: development, staging, or production.
The Zend Server Center includes information helpful in understanding the meaning and effect of each directive on the installed PHP. Additionally, it assists in setting up the Zend Debug Server access lists.
C.4.3. Installation and Registration
The following describes the download, installation, and registration procedure of the Zend Studio application:
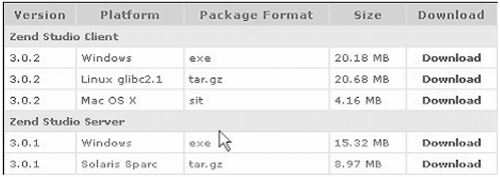
1. | | 2. | Select the relevant platform from the figure above and click Download. Do one of the following:
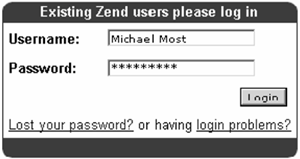
I f you are a current Zend user, type in your Zend Username and Password to Login and skip to Step 4. 
If this is your first time at Zend, click Sign Up Now (on the lower-right side of the screen) to register.
Complete the registration form and click Submit. Mandatory fields are underlined; however, any additional information will assist us in providing you with a better service.
Note
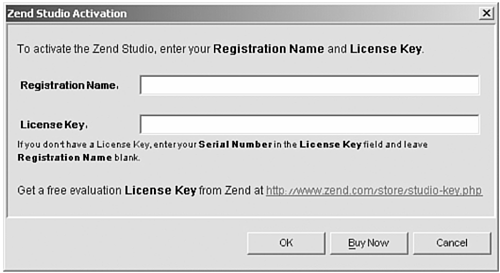
Upon registration, you will receive a welcome email, confirming your Zend username. We recommend that you keep this for future reference. | 3. | You are now ready to download the Zend Studio application. A status screen shows you the progress of your download. Before launching the product for the first time, you will need to convert the serial number on the inside back cover of the book to a license key. To do so, simply go to http://www.zend.com/book and follow the instructions on the page. | 4. | After downloading the file, activate the .exe file in Windows, or extract and activate the installation file and follow the installation process. Be sure to read the installation instructions. You are now ready to launch the application. Once you have the license key, launch the product and enter the provided Registration Name and License Key in the Zend Studio Activation dialog box, then click OK.
 | 5. | From this point on, Zend Studio Client's installation shield guides you through the installation process.
| 6. | Read the license agreement carefully andif you agreecheck the first option. Click Next to continue.
| 7. | Enter the folder location for the installation or accept the default one. Click Next to continue.
| 8. | Choose a shortcut folder and check the option below if you want to create icons for all users. Click Next to continue.
| 9. | Check the components you want to install. Click Next to continue.
| 10. | Choose to enable or disable Browser Help Objects (BHOs) from the Browser Configuration screen. Click Next to continue.
| 11. | Check the relevant file extensions for file types you want to associate with Zend Studio Client. Click Next to continue.
| 12. | Studio Client Installation verifies the installation folder you entered and supplies you with disk space information. Click Next to continue. Zend Studio Client version 3.5.x is now being installed. Progress screens indicate the progress of the installation procedure. These screens also provide information about the product and how to contact the manufacturer.
| 13. | If you want to install the Zend SafeGuard Suite at this stage, check Yes. Otherwise, check No and click Next.
| 14. | Zend Studio Client continues installing. At this point, the 'Important Information' screen appears, telling you how to enable the Zend Studio Browser Toolbar integration. Click Next to continue. Zend Studio Client is now installed on your machine. It is recommended that you read the README file prior to launching the application. | 15. | Click Done. The ReadMe file opens.
|
|


