11.3. Template SystemsTemplate systems are PHP components that let you separate application logic from display logic, and offer a simpler template format than PHP itself. It is ironic that PHP, which essentially started out as a template language, is used to implement template systems. But, there are good reasons for doing this besides the code/presentation separation, such as giving web designers a simpler markup format they can use in their page authoring tools, and developers greater control over page generation. For example, a template system can automatically translate text snippets to another language, or fill in a form with default values. A vast number of template systems are available for PHP. This is caused by the fact that along with database abstraction layers, template systems are one of the PHP components that arouse the strongest feelings and little will for compromise in developers. As a result, many people have written their own template system, resulting in a wonderful diversity and lack of standardization. 11.3.1. Template TerminologyBefore you dive into the various template systems, you may want to familiarize yourself with the template lingo (see Table 11.1).
11.3.2. HTML_Template_ITThe first PEAR template system you will familiarize yourself with is HTML_Template_IT, or just IT. This is the most popular PEAR template package, but it is also the slowest because it parses templates on every request and does not compile them into PHP code. Tip The HTML_Template_Sigma package provides an API that is compatible with HTML_Template_IT, but compiles templates into PHP code. 11.3.2.1 Placeholder SyntaxIT uses curly braces as placeholder delimiters, like this: 4
<head><title>{PageTitle}</title></head>
This is the most common placeholder syntax, so chances are a template using only placeholders will actually work with different template packages. 11.3.2.2 Example: Basic IT TemplateThis example is "Hello World" with HTML_Template_IT: <?php
require_once "HTML/Template/IT.php";
$tpl = new HTML_Template_IT('./templates');
$tpl->loadTemplateFile('hello.tpl');
$tpl->setVariable('title', 'Hello, World!');
$tpl->setVariable('body', 'This is a test of HTML_Template_IT!');
$tpl->show();
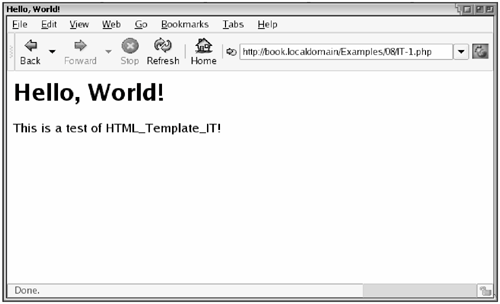
First, you create an HTML_Template_IT object, passing the template directory as a parameter. Next, the template file is loaded and some variables are set. The variable names correspond to placeholders in the template file, so the {title} template placeholder is replaced with the value of the "title" variable. Finally, the show() method does all the substitutions and displays the template output. This template file is used in this example: <html>
<head>
<title>{title}</title>
</head>
<body>
<h1>{title}</h1>
<p>{body}</p>
</body>
</html>
Figure 11.1 shows the result. Figure 11.1. Basic IT template output. 11.3.2.3 Block SyntaxFor blocks, IT uses HTML begin/end comments like this: <!-- BEGIN blockname -->
<li>{listitem}
<!-- END blockname -->
Blocks may be nested, but it is important that you start processing at the innermost block and work your way out. 11.3.2.4 Example: IT With BlocksFirst, install HTML_Template_IT: $ pear install HTML_Template_IT downloading HTML_Template_IT-1.1.tgz ... Starting to download HTML_Template_IT-1.1.tgz (18,563 bytes) ......done: 18,563 bytes install ok: HTML_Template_IT 1.1 This example uses blocks to implement a simple foreach-like loop in the template: <?php
require_once "HTML/Template/IT.php";
$list_items = array(
'Computer Science',
'Nuclear Physics',
'Rocket Science',
);
$tpl = new HTML_Template_IT('./templates');
$tpl->loadTemplateFile('it_list.tpl');
$tpl->setVariable('title', 'IT List Example');
foreach ($list_items as $item) {
$tpl->setCurrentBlock("listentry");
$tpl->setVariable("entry_text", $item);
$tpl->parseCurrentBlock("cell");
}
$tpl->show();
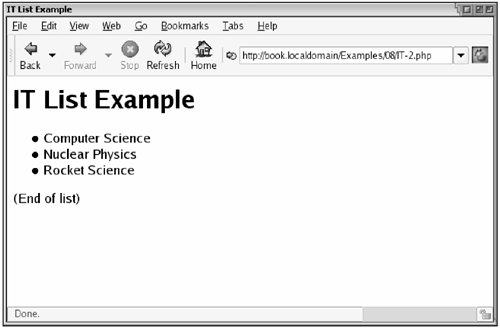
This example sets up the IT object like the previous one, but calls setCurrentBlock() that specifies to which block the following setVariable() call applies. When parseCurrentBlock() is called, the block is parsed, placeholders are substituted, and the result is buffered until the template is displayed. This is how the block template appears <html>
<head>
<title>{title}</title>
</head>
<body>
<h1>{title}</h1>
<ul>
<!-- BEGIN listentry -->
<li>{entry_text}</li>
<!-- END listentry -->
</ul>
(End of list)
</body>
</html>
Figure 11.2 shows the results. Figure 11.2. IT with blocks output. Finally, IT lets you include other template files anywhere in your template, like this: <!-- INCLUDE otherfile.tpl --> In this block example, you could substitute the block contents with just an include tag, and HTML_Template_IT would include that file for every iteration of the block. By using includes carefully, you can structure your templates so you obtain reusable sub-templates. 11.3.3. HTML_Template_FlexyThe next template package is HTML_Template_Flexy, or just Flexy. Even though pure placeholder templates written for IT will work out-of-the-box with Flexy, these two template packages are very different. First, Flexy operates on objects and object member variables instead of variables that are in turn stored in associative arrays as with IT. This is not a big difference in itself, but Flexy has the advantage that you can give it any object, of any class, and your template can access its public member variables. 11.3.3.1 Example: Basic Flexy TemplateHere is a "Hello, World!" example with Flexy: <?php
require_once 'HTML/Template/Flexy.php';
$tpldir = 'templates';
$tpl = new HTML_Template_Flexy(array(
'templateDir' => 'templates',
'compileDir' => 'compiled',
));
$tpl->compile('hello.tpl');
$view = new StdClass;
$view->title = 'Hello, World!';
$view->body = 'This is a test of HTML_Template_Flexy';
$tpl->outputObject($view);
A little more code is required to set up Flexy because you need to specify both the template directory and compile directory. The compile directory is where the compiled template files are stored. This directory must be writable by the web server. By default, the compile directory is relative to the template directory. Next, the hello.tpl template is compiled. You should notice that this is the same template as in the first IT example; this works because the template contains only two simple placeholders. Compilation is time-consuming, but is done only once or whenever the template file changes. As a result, you will notice that the first time you load this page, it takes a long time. Subsequent page loads are much faster. When a template is compiled, the compiled version is placed in compileDir. In the previous example, this is the "compiled" directory relative to the current directory. This directory must be writable by the web server, because templates will be compiled on demand by PHP when a user hits the page. Finally, an object holding view data is created and passed to the outputObject() method, which executes the template and prints the output. 11.3.3.2 Example: Flexy with BlocksThis example corresponds to the "IT with Blocks" example: <?php
require_once 'HTML/Template/Flexy.php';
$tpldir = 'templates';
$tpl = new HTML_Template_Flexy(array(
'templateDir' => 'templates',
'compileDir' => 'compiled',
));
$tpl->compile('flexy_list.tpl');
$view = new StdClass;
$view->title = 'Flexy Foreach Example';
$view->list_entries = array(
'Computer Science',
'Nuclear Physics',
'Rocket Science',
);
$tpl->outputObject($view);
This time, the template file is different because it is using more than just placeholders and is no longer compatible with IT: <html>
<head>
<title>{title}</title>
</head>
<body>
<h1>{title}</h1>
<ul>
{foreach:list_entries,entry_text}
<li>{entry_text}
{end:}
</ul>
(End of list)
</body>
</html>
If you compare the PHP code in this example with the corresponding IT example, you see that all the hassle of parsing blocks is gone. This is because the template is compiled; instead of dealing with flow-control on its own, Flexy leaves this to PHP's executor. Look at the PHP file generated by the Flexy compiler: <html> <head> <title><?php echo htmlspecialchars($t->title);?></title> </head> <body> <h1><?php echo htmlspecialchars($t->title);?></h1> <ul> <?php if (is_array($t->list_entries) || is_object($t >list_entries)) foreach 11.3.3.3 Flexy Markup FormatSo far, you have seen examples of placeholders and the {foreach:} construct in Flexy. Table 11.2 gives a full list of the constructs that Flexy supports.
11.3.3.4 Flexy HTML Attribute HandlingOne of the interesting things about Flexy is how it handles HTML/XML elements and attributes in the template. To give you an example, here is the last example again with the template changed to use a Flexy HTML/XML attribute for controlling a block: <html>
<head>
<title>{title}</title>
</head>
<body>
<h1>{title}</h1>
<ul>
<li flexy:foreach="list_entries,text">{text}</li>
</ul>
(End of list)
</body>
</html>
The {foreach:} construct is gone; it is replaced by an attribute to the element that is being repeated: <li>. This looks a bit like XML namespaces, but it is not; the Flexy compiler removes the flexy:foreach attribute during compilation, and generates the same PHP code as the {foreach:} variant. The compiled version of this template looks like this: <html> <head> <title><?php echo htmlspecialchars($t->title);?></title> </head> <body> <h1><?php echo htmlspecialchars($t->title);?></h1> <ul> <?php if (is_array($t->list_entries) || is_object($t- >list_entries)) foreach The XML/HTML attributes supported by Flexy are outlined in Table 11.3.
11.3.3.5 Flexy HTML Element HandlingFinally, Flexy can parse HTML form elements and fill them in with correct data. This makes it easy to create a form template in some web-design tool without having to dissect the template before using it on your site. Flexy handles the following four HTML elements (see Table 11.4).
When Flexy finds any of these HTML elements in the template, the element is replaced by PHP code that outputs the element with the right attributes: <html>
<head><title>{title}</title></head>
<body bgcolor=white>
<form name="myform">
{user_label} <input type="text" name="user">
<br>
{pw_label} <input type="password" name="pw">
</form>
</body>
</html>
In this template, the <form> and <input> elements will be replaced by Flexy, with parameters filled in. |


 ($t->list_entries as $entry_text) {?>
<li><?php echo htmlspecialchars($entry_text);?>
<?php }?>
</ul>
(End of list)
</body>
</html>